Adventures in Homelab Cooling
Posted: August 13, 2019
So, as part of my home setup that I bravely refer to as a homelab, I have a number of large supermicro servers (2U apiece) that serve as 3D rendering rigs. These are the loudest machines I have by far, especially when they spool up their fans fully to cool themselves.
Fail
This one didn't work out. The Noctua coolers just weren't able to keep up with the thermal load of the processors. Attempts include: Replacing main fans, replacing with active coolers, adding fans to passive coolers. No dice.
Setting the stage
Now, I’d heard about fans made by a company called Noctua, which are supposedly used in homelabs especially because of their quietness. So yeah, I would like some of that. I set out to find out how to get them in my machines. Because Supermicros are just not awfully common, documentation was minimial (as it seemingly always is when I set out on adventures like this) so, failing good reference, we begin tinkering. I opened up one of them I had chosen to be the guinea pig, and figured out what I needed.
Getting Started
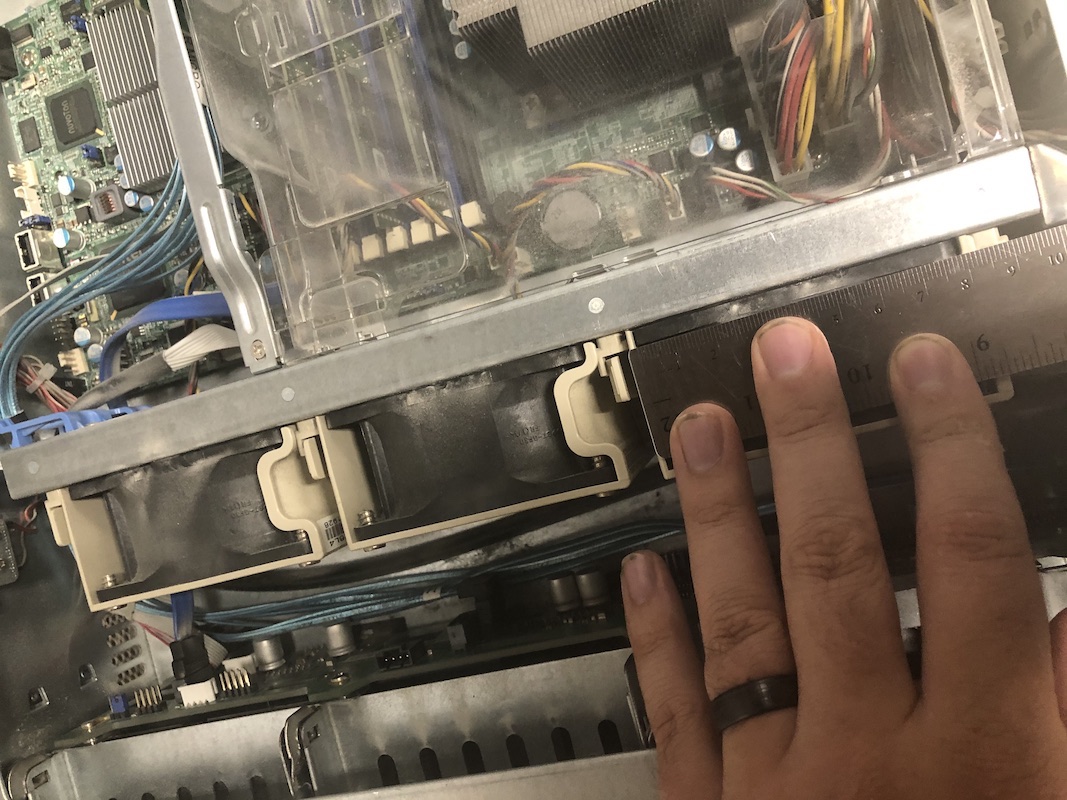
The stock fans measured 80x80x35mm, and were marked as V80E12BHA5-57. Looking up specs on them revealed, as you’d expect, they moved tons of air: 72.5 CFM, at peak RPM, 7000. I also made note that the actual CPU coolers were passive. No fans present. These three fans rammed air through the chassis to cool the entire machine.
Now, I think these fans are massively overspec for what I do; namely because these machines have 8 drive bays up front, and along with cooling the CPU, these are also clearly (and arguably, are more for) cooling the drives, and more specifically, the drives AND the RAID card AND the cpu AND the RAM. Now in my environment, these have one SSD per. There is zero thermal load up front. So I think we can get away with less for fans.
I looked up both Noctua 80mm fans, and a Noctua low-profile cooler that would fit LGA1366 CPU slots, and ordered three of the former, and two of the latter.
Attempt One
So the first thing to arrive were the 80mm fans. I shut down my experimental machine, hostname Stalingrad, and opened it up to retrieve the stock fans. As with most server parts they were quite easy to remove (I do enjoy hardware actually designed to be serviced, so refreshing.).
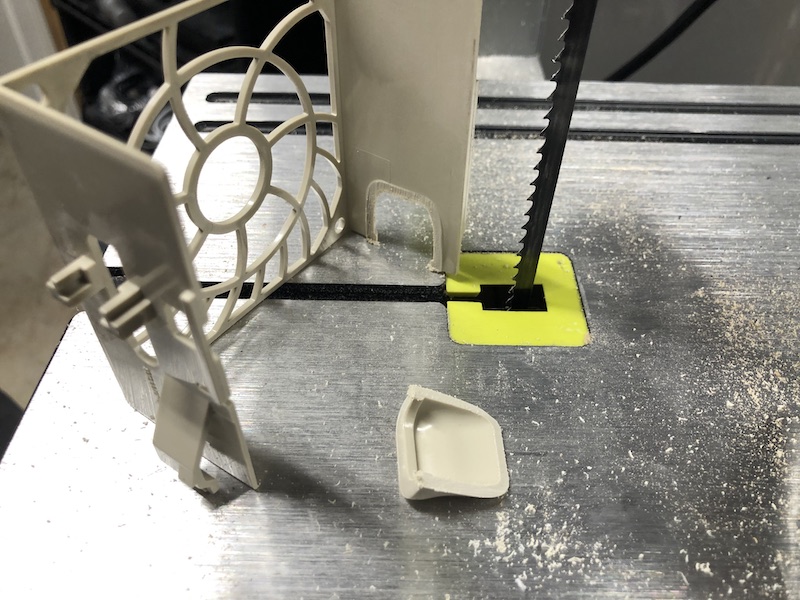
First hurdle: The stock fan holders had a specifically shaped bit to locate the fans. Why I have no idea, it seems entirely superfluous what with the four screws actually doing the holding. Nevertheless, they had to go. This was easily handled with the band saw.
Next, I realized that while the pin arrangement was fine, the plug itself had locating slats that didn’t line up with the server hookup. This too was a straightforward fix, with a steady hand and an exact-o knife.
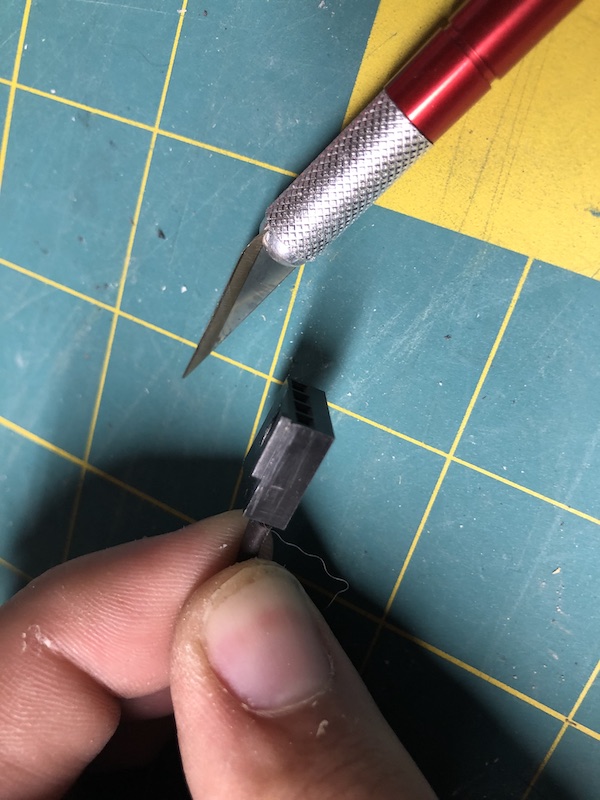
And then they were fitted.
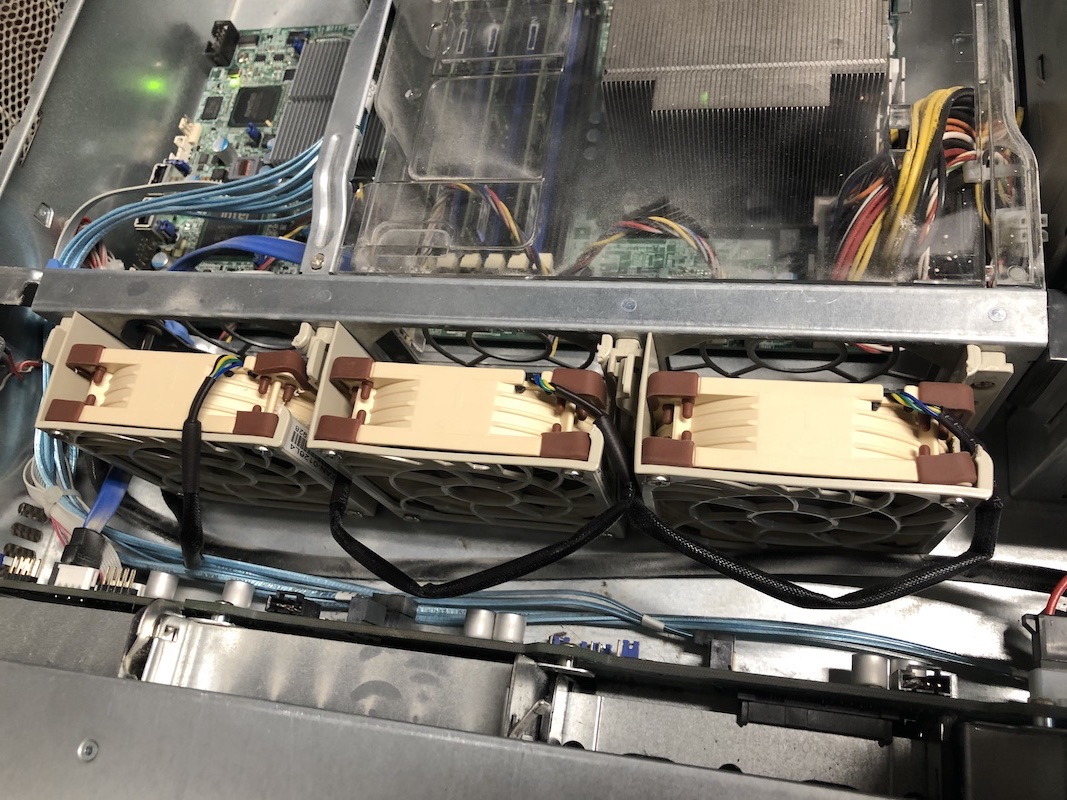
Now, on the quiet front, these fans succeeded massively. In fact for a moment I thought they failed, because I heard nothing during the POST. Once the machine booted, I took a look at both it and the idle temp of one of it’s sister machines, Magellan: Magellan which had been sitting idle was hovering between 67 and 68 degrees Celsius, and Stalingrad was now at 69. But, that was also right after boot, so I left it simmer for a half an hour or so, until it settled at around 81 degrees. This is the max recommended operating temperature, I think the server expects to only hit that temperature while operating, because it would run the fans at a low speed until it reached that, and then increase from about 700 RPM to about 1900 RPM (about 80% of the total speed available on these fans.).
My other major concern was that the Noctua fans operated at WAY fewer amps and I had wondered if the motherboard would simply burn them out, but no such misfortune.
Now, a 15 degree increase in idle temp is nothing to sneeze at, but despite my initial worries, the system remained stable at idle, so if nothing else these will likely come in handy with my lower-demand servers. That said, I attempted to put the system on load and it quickly rose into the 95C range, and that’s no good. Time to buckle down and wait for the low profile CPU coolers.
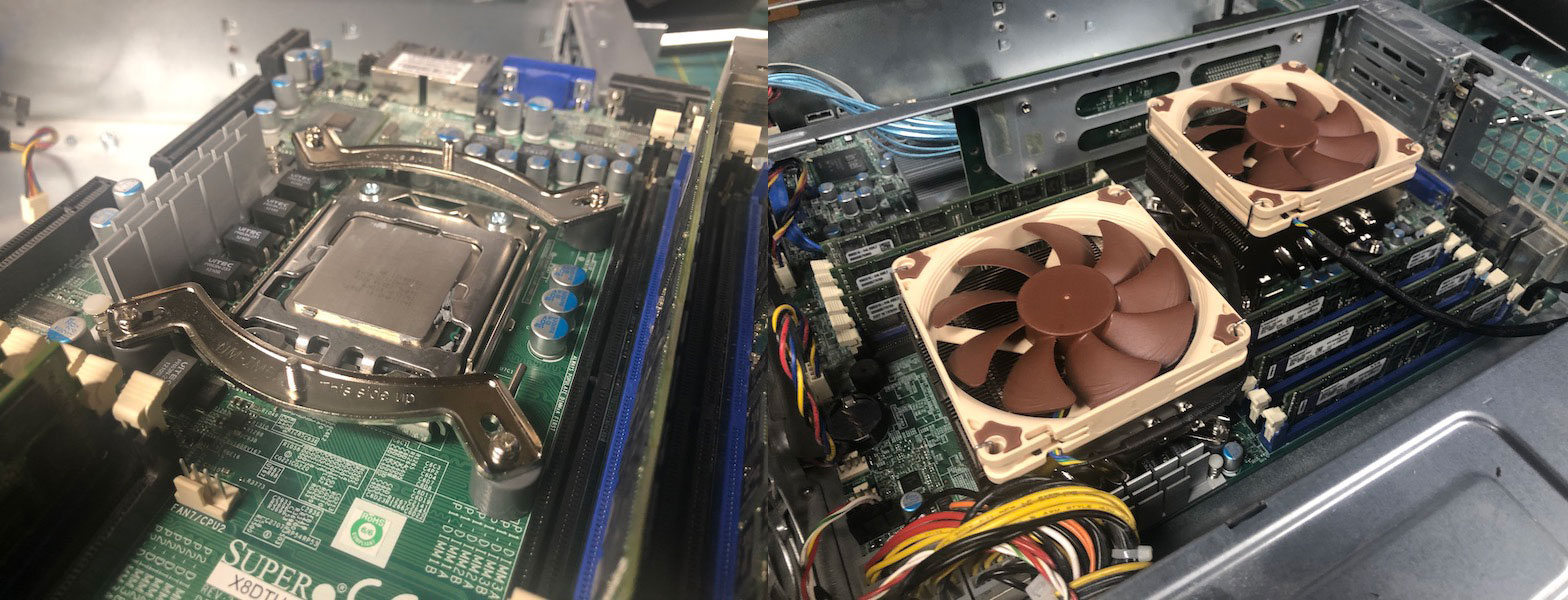
Attempt Two
CPU coolers arrived, but not without some additional difficulty; the existing coolers attached to the board via a mounting backet with threaded holes, and screwed in from the top. Initially I figured I could just remove the bracket, but as it turns out, the bracket is part of the component that affixes the CPU’s to the board. Shit.
So, instead, I removed the existing heatsinks, cleaned up the heat transfer compound and applied new, and then had to run to the hardware store to find the right screws. Annoying, but fine. I attached the new heatsinks and got the fans connected.
Booting up the machine unfortunately resulted in slightly lower temps, hovering between 77 and 80 Celsius but still, not good enough. I could see the fans ramping up and down, but while testing under load, the temps shot up to 92 again after just a few minutes.
As far as I can tell, the smaller heatsinks just didn’t have enough thermal mass to take up the heat from the chips. So let’s back to the big ones. I decided to try adding a fan to the existing heatsinks, which gives me two benefits:
- Less work to modify the other two machines
- Cheaper parts (60mm fans are about 1/4 of the price of the new heatsink)
Sadly I’d already damaged the new cpu coolers, so returning isn’t an option. Hopefully I can use them on the other machines. Into the parts bin, and I put in the order for some 60mm fans.
Additionally, since these sinks aren’t designed to accommodate fans, I had another problem to solve. How to go about mounting them? I have a 3D printer, and I have drafting software. This was exceptionally cool for me because despite printing many things (usually for Cosplay) I hadn’t actually made something from scratch yet, and there’s a special level of awesome involved in designing something from nothing and having a robot make it for you.
So they arrived, and I added them. Unfortunately, made literally not a bit of difference. Maybe a degree down but overall, not even close to what I need.
I think at this point I need to retire these and move to newer chips in order to reduce the thermal overhead. Ah well, still was a fun project.